Some Known Details About Drywall Repair Jackson
Wiki Article
What Does Drywall Repair Jackson Mean?
Table of ContentsThe Ultimate Guide To Drywall Repair JacksonDrywall Repair Jackson for DummiesThe Ultimate Guide To Drywall Repair JacksonDrywall Repair Jackson Can Be Fun For EveryoneThe smart Trick of Drywall Repair Jackson That Nobody is DiscussingExcitement About Drywall Repair JacksonThe 10-Minute Rule for Drywall Repair JacksonDrywall Repair Jackson - An Overview
After that you'll cut another item as well as repeat the process up until you finally figure out how to put a screw in the center to hold it in position till you can affix the board to the existing wall surface. Next, you will screw a spot to the center of the board. Which has a 50/50 possibility of pressing the board right into the wall, tearing the screws through, as well as falling under the dental caries.The repair kits are much more pricey, especially when you have multiple holes to patch. Making a drywall California patch, on the other hand, needs no support, no screws, and also no tape.
They are kept in area by leaving the dealing with paper bigger than the opening to act as integrated joint tape. The advantages of making use of a California patch for drywall fixings are that they are cheaper, are fully adjustable to whatever dimensions you need, and are quicker than taping. You can also use a different thickness of drywall.
Drywall Repair Jackson Can Be Fun For Anyone
An additional plus is that the drywall paper is thinner than the majority of joint tape, making it less complicated to float out. Simply an opening in the wall surface.
It's much less complicated to begin with something square than to try to form the repair service piece to fit. This isn't an art course, so no need to obtain adorable below. Determining the width of the opening, about 1" bigger right around. Square up the intermediary. Ready to cut.
Some Known Factual Statements About Drywall Repair Jackson
Step 2: Cut a scrap piece of drywall regarding 2" larger in each instructions. You desire a 1"- 2" overlap completely around. It'll make sense soon, I assure. This does not need to be precise either, but also for screen factors, I gauged my own out. Gauging for the width of the California patch.Marking the elevation. Once more concerning 1" past the intermediary. Patch was gauged and marked about 2" larger as well as 2" taller than the cutout. The preliminary spot is currently prepared to note the backside. Step 3: Turn the scrap item upside-down and also facility it under the opening. Mark the within dimensions for your vertical cuts.
This will be your horizontal cuts. Marking the elevation of the cutout onto the rear of the drywall spot. Step 5: Square up and rack up the back side of the drywall. I know, this goes versus whatever you were instructed concerning cutting drywall. However believe me, this is the exception.
The Basic Principles Of Drywall Repair Jackson
Step 8: Delicately roll the snapped piece by drawing your fingers in and also pushing your thumbs out and also away. It's easiest if you rest the contrary edge on a solid surface area - Drywall Repair Jackson. Peeling off the snapped piece from the front paper Step 9: As you roll the piece, it separates from the front paper starting at the scored side and also taking out.You must have a repair work item with one saggy notepad hanging off. The first side removed. Action 10: Repeat actions 6-9 for each and every side. Suggestion: start with your quickest item. The smaller the piece the harder it is to break off. And also the more you snap off the smaller the staying items are.
Beginning with the fastest sides initially. Peeling the other sides. Pull from the racked up side to the exterior of the patch. Action 11: You should be left with a drywall plug surrounded by loose paper. Clean off any visit our website residual gypsum on the paper. You'll require this to lay flat on the wall and any crumbs will make that difficult.
The 8-Second Trick For Drywall Repair Jackson
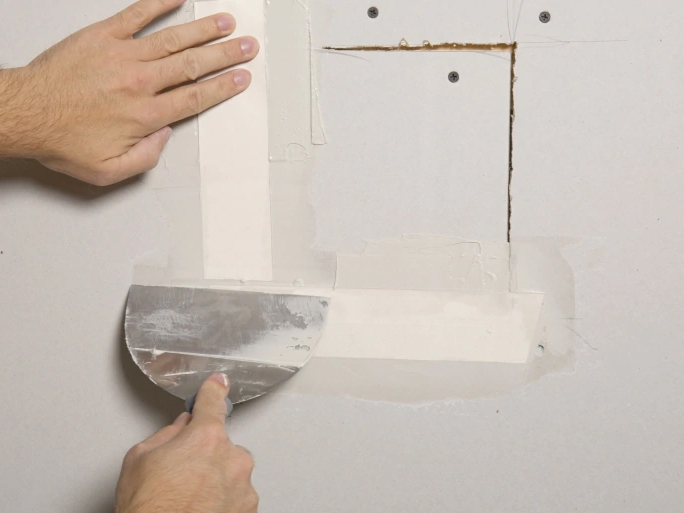
Right here are a couple of points to remember of: You desire your spot to be as close to flush with the wall as you can. But if you have to err on one side, bear in mind that in is far better than out. Unlike burps. You intend to fill up the gaps around the spot, but not a lot that the mud falls under the dental caries.Pro Suggestion: You don't wish to exhaust the paper. It will certainly want to tear quicker as opposed to later. Ok, so we have those information exercised. Maintain those in mind as we go through these actions of installation. Step 1: Mix up some warm mud. We choose warm mud here since it dries out faster, does not diminish as much, as well as has excellent adhesive top qualities.
Step 2: Make a mud bed around the hole. Action 3: Currently take some mud as well as smear it on the behind of the California patch.
Our Drywall Repair Jackson PDFs
Tip 8: Gently roll the snapped item by drawing your fingers in and also pressing your thumbs out as well as away. It's easiest if you relax the opposite edge on a strong surface area. Peeling off the snapped item from the front paper Step 9: As you roll the piece, it detaches from the front paper starting at the racked up side as well as taking out.
You should have a repair work piece with one floppy paper hanging off. The initial side removed. Action 10: Repeat actions 6-9 for every side. Suggestion: start with your fastest item. The smaller the piece the much more challenging it is to snap off. And also the even more you break off the smaller the remaining items are.
The 9-Second Trick For Drywall Repair Jackson
Draw from the scored side to the outside of the patch. Action 11: You need to be left with a drywall plug surrounded by loosened paper. You'll require this to lay flat on the wall surface and any type of crumbs will certainly make that difficult.Here are a couple of things to take note of: You want your spot to be as near to flush with the wall as you can. You desire to fill up the voids around the spot, yet not so much that the mud drops right into the cavity.
Maintain those in mind as we go via these actions of installment. Step 1: Mix up some hot mud. We click to read more choose hot mud here because it dries faster, does not diminish as much, as well as has fantastic adhesive high qualities.
See This Report on Drywall Repair Jackson
Step 2: Make a mud bed around the opening. Step 3: Currently take some mud and smear it on the behind of the California patch.Report this wiki page